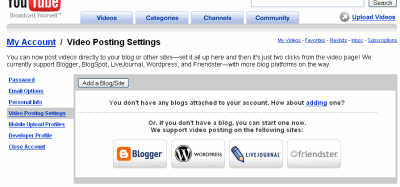
Most people add video to their blogs by first uploading the video to YouTube, then using the embed script provided by YouTube in their blogs. In fact, YouTube also allows you to post directly to your blog in their Video Posting Settings.
While this seems like a sound strategy, I figured that there might be some occasions that you might want to host the video yourself, for example:
- You want to create a video e-course (that is supposed to be limited to the people watching the video)
- You want control over the speed and stability of the source (I’m not saying the YouTube is slow or unreliable, but I personally believe that reliability comes better when you pay some money, you can’t control when YouTube decides to take down your video, right?)
- You don’t like the YouTube player.
- You are a control freak like me.

In this cases, you will need some tools for you up get that video up on your blog.
One very popular software that many Internet Marketers use is Camtasia Studio. I’ve personally used the 30 day trial and its certainly an excellent piece of software that does almost everything for you. Unfortunately, it also comes with a hefty price tag of $319!
For that price, I could buy a basic suite of Ms Office applications, get the latest copy of Dreamweaver, or even get myself a good digital camera! So… let’s wait till I have excess cash before I make my Camtasia studio. Hmm… will that day come?
As an alternative, you can check out these few pieces of software:
- CamStudio – CamStudio does excellent screen captures and even allows you to input your voice. You can export your captures in AVI or SWF.
- Riva FLV Encoder – This free application allows you to convert your video files into the format that YouTube uses, FLV.
- Flash Video Player – A web based FLV player for you to stream your videos on the web.
- … and the accompanying WordPress plugin for the Flash Video Player, so you can easily add the video to your blog posts
So what I would do, is to:
- Screen capture in CamStudio and export as an AVI
- Head on to my Windows Movie Maker and make any adjustments
- Covert the file to an FLV using the Riva FLV Encoder
- Use the Flash Video Player to display the video on your blog, with help from the WordPress plugin
Sounds pretty neat for a totally free solution, right?
Okay, this process is a little long winded – Camtasia Studio does the first three steps for you with one application. It even nicely exports your videos together with accompanying HTML code to display on the web. Camtasia Studio also have extra perks like highlighting of mouse pointer and clicks, importing for a web cam, captions, two audio tracks etc etc.
Its a whole lot of features you get for $319. Well, but its still $319! I would probably consider a “lite” version if they had one.
So. Three ways: YouTube (or Google Video), Camtasia Studio, or the CamStudio to MovieMaker to Riva to FlashVideoPlayer combo. You choose.
Excellent blog entry Kian Ann! I’ve never been able to get my FLV video to play directly in WordPress so for now it’s on a seperate webpage.
I use the free Microsoft Windows Media Maker to edit videos, and then use a free converter to convert it to FLV format. Then I use a javascript to make the video appear with a custom player.